Sciencegeek Kinetic Art Asteroid Electronic Perpetual Motion Desk Toy Home Decoration
Create your own art toys
If y'all don't know what an art toy is, or you have never seen i, at that place's probably a good reason. It's quite a niche industry, but filled with some of the nicest people and well-nigh talented artists in the world. About 10 years agone every homo and his dog was talking virtually it; nowadays information technology's quite a steady industry, just one that's growing in popularity every day.
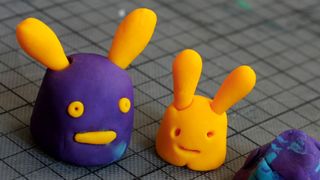
Art toys are predominately fabricated by artists who have a desire to run into their characters come to life in glorious 3D. In many ways, it'south an extension of their character development.
These toys are found at comic conventions worldwide, and are frequently handmade in low volume runs (every bit low every bit 50 or 100 pieces), which can potentially brand them much sought-after and valuable. The figures are commonly around eight-15 inches, and many artists starting time pocket-sized so they can industry on a depression budget, either by hand resin casting using silicone tools, or in vinyl plastic using rotocast or injection moulding methods (typically washed at a factory in China) for larger quantities. This 2-office workshop will focus on resin and silicone casting.
- Why teaching yourself newspaper craft could earn you more money
Before you beginning making your own resin art toys, y'all need to sympathize that there are two chief methods of production. The commencement is the basic method of silicone tooling, which uses simply one block of silicone to make simple objects and characters. This method is what we will focus on here, because it'southward the preferred casting method for beginners.
Divide tooling is the more advanced technique, designed to requite you greater command over your split up lines on each bandage while assuasive you lot to produce more than complex objects.
Sketching ideas
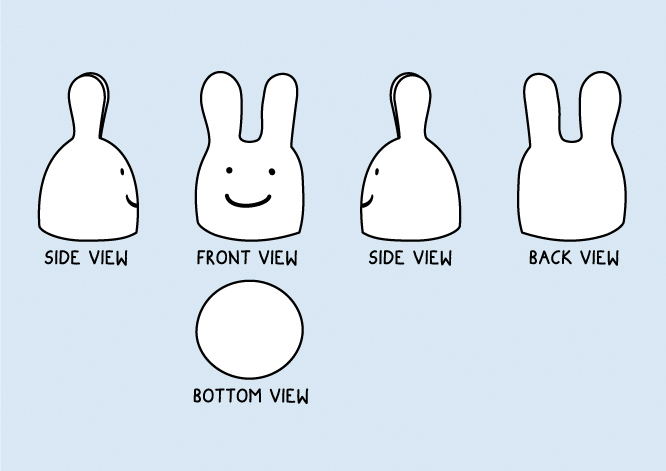
In the first part of this workshop, I'll focus on having a solid idea and producing 2D 'turnarounds' (encounter the image above). Once yous have these, yous can commencement to experiment in 3D using plasticine, and then gear up to producing a model using Super Sculpey clay.
You'll need some paper, pens, a ruler, a computer and printer, and some Super Sculpey clay and plasticine. I'd also recommended you buy yourself a modest set of modelling tools.
Before you make anything, though, you need to take a skilful idea of what you want to make. Your idea can be something new you create just for this project, or something that y'all've been drawing for years and want to come across finally brought to life in 3D.
Start by sketching out a few ideas and choose a graphic symbol that isn't too complicated. Some things simply aren't suitable for resin casting, such as thin forms like hairs or very long spikes.
The longer and thinner the shapes, the harder it volition ultimately be to get resin into these parts and actually pull the resin cast from the mould. Besides, the thinner a design element, the longer it volition take the resin to harden.
Turnaround drawings
Turnaround drawings are a set of drawings that show six projected views of a character: the front, left side, right side, back side, and if required, the top and bottom likewise. Ideally, it's all-time to describe this up in Illustrator, because you can make adjustments and scale it as you see necessary. You tin can too apply the drawings to come across what color yous'd like and how your model will look overall in the last design.
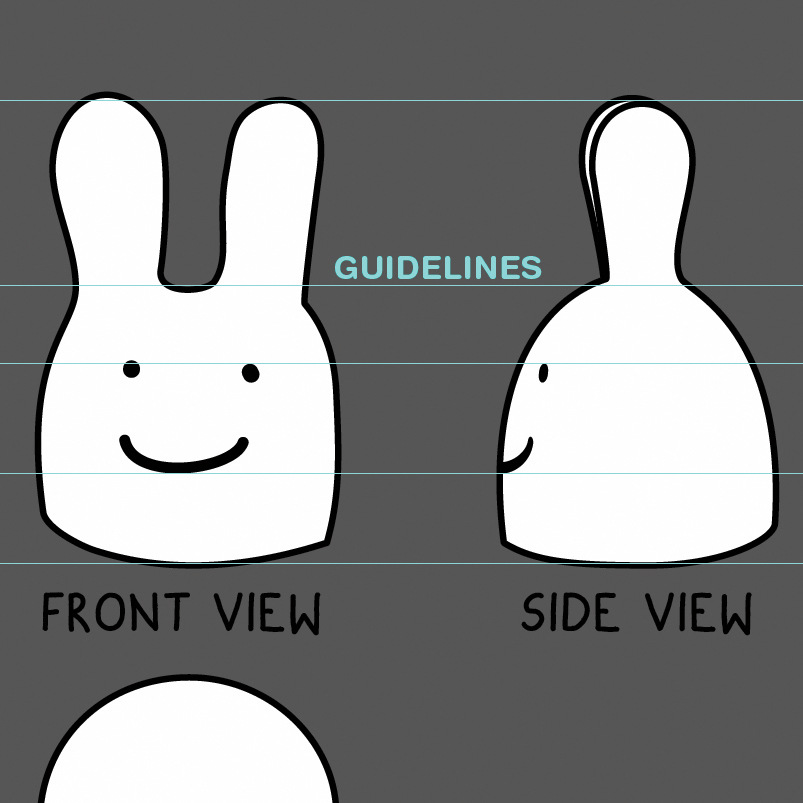
The best way to build upwardly another view is to use one drawing to create another. Draw the front first and then use this cartoon to build up the other views. Add guidelines taken from the front view (see image above) to help yous work out where to draw the essential details; this will assist you institute things like where the height of the caput finishes, where the arms end, and and then on.
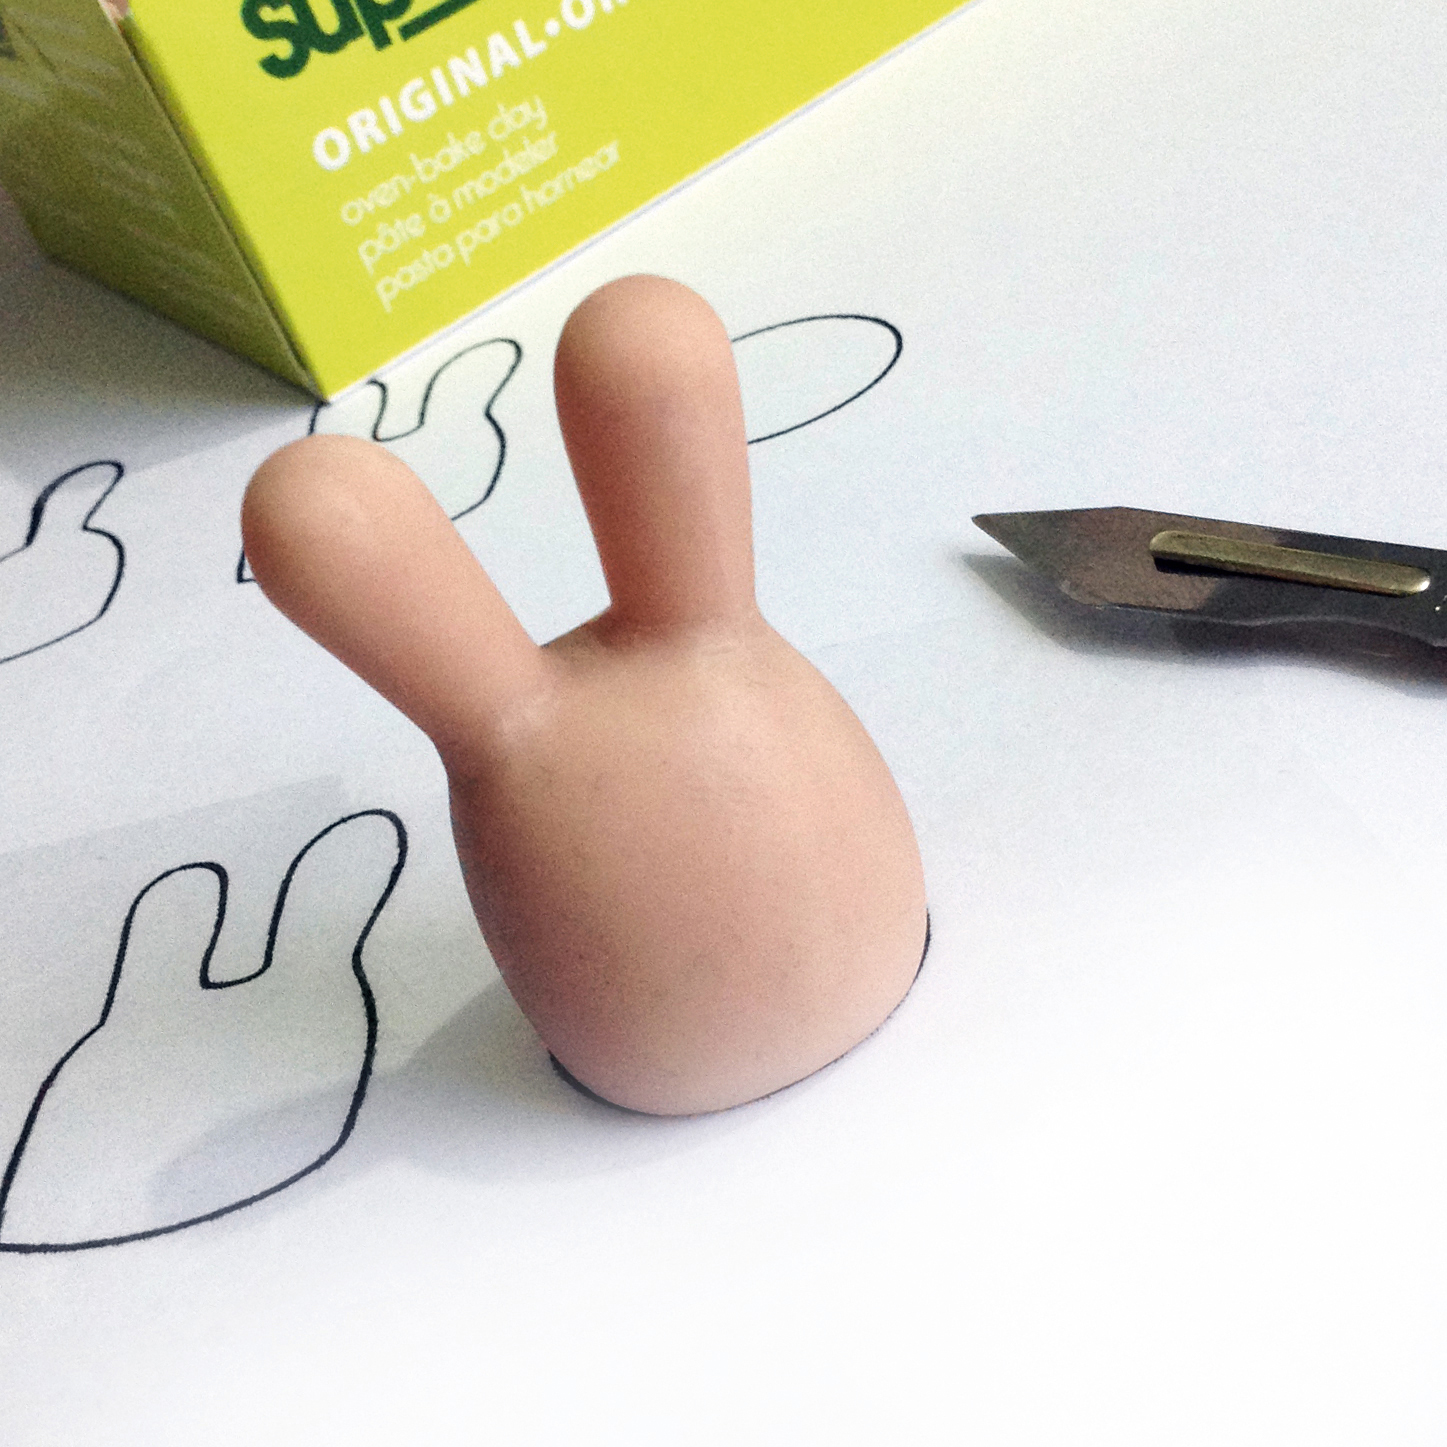
In one case you have your turnaround drawing, print it out for reference at the right working scale. To go along it clean, I'd recommend putting a layer of clear sticky tape over information technology, providing a thin protective layer; you can and then work on top of these guides direct while using the clay. It's a smashing mode of making 1 guide terminal a long time, and makes model-making easier and quicker.
Beginning sculpting in 3D
Now build a rough 3D model of your character using plasticine clay. Don't be precious well-nigh how much you apply; this is a fun, experimental stage and takes a while to master.
Build lots of models and endeavor out different colours. I normally use my whole hand: the palm for rolling soft shapes like balls, the fingers for rolling out sausage shapes, and fingertips for the fine details. I find I do a lot of fingertip patting down to get actually smooth shapes like domes and to reduce the visibility of my ain fingerprints. If you need a circle shape in the pattern, endeavour using a pen lid or the cap of a bottle. Look around you to see what other objects brand interesting impressions; plasticine clay takes details really well.
It'southward worth taking a moment at this point to refine your design, and you will probably need to retune your turnaround drawings from what you accept learnt using clay.
Once you're comfy with clay, get out some Super Sculpey. Brand sure you knead it well, and have a play to create your model. Super Sculpey tin exist broiled and so it goes hard, and you tin can also sand it and exercise all sorts of stuff with it.
Next effect, we will exist using Super Sculpey to make a master, so in the meantime, please read the instructions on the box you bought and become set up to make a master model in part two.
If you lot are interested in furthering your knowledge and fancy getting down and dirty with this fun process, check out the Plastik Surgery website and buy a copy of the Plastik Surgery Handbook to get making.
In the second part of this workshop I will reveal how to finish creating your resin fine art toy.
This commodity was originally published in Calculator Arts magazine issue 262. Purchase it hither.
Related manufactures:
- 11 inspiring design toys for your desk
- Inside Etsy'south handmade workspace
- fifteen tips for creating characterful creature fine art
Related articles
Source: https://www.creativebloq.com/features/create-your-own-art-toys
0 Response to "Sciencegeek Kinetic Art Asteroid Electronic Perpetual Motion Desk Toy Home Decoration"
Postar um comentário